

The foundation colour is not true in the left-hand photo for some reason! It is actually lemon as in the right hand pic and the one above. But the close-ups show you the stitches clearly.
I LOVE doing Puff Stitches! But then I say that about every stitch! Whatever I am doing at the time seems to become my favourite - until the next one!! Anyway, originally I did a picot edge in lemon after the last row of random rainbow coloured half trebles - but then I decided it detracted from the Puff Stitch and was unnecessary so I undid it.

Then I decided to knit a matching hooded coat.
This time, unlike my Rainbow Ripple blankets which are made from my own selection of single-coloured Stylecraft DK yarns, I used a multi-coloured wool, which I also used for the squares and some rows in the border of the pram blanket. It is a random self-striping yarn by ICE called Dancing Baby and comes in a wide variety of colours. I also often use another called ICE Magic. They are machine washable and lovely to work with - the only problem is I have only ever found it online and the manufacturer is in Turkey, so the postage costs a bit but I think it's worth it.
 So, yesterday evening while watching TV with P, I started knitting the back, in Moss Stitch to add texture. I wanted to make the coat match the blanket even more and was going to knit a border around the bottom edge, the border of the hood and the ends of the sleeves, in the matching lemon. But then I thought why not crochet a Puff Stitch border the same as on the blanket? I have never crocheted borders on my knitted projects before but, if this works, and it looks like it will, it could become a regular thing!
For the coat border I used a smaller hook (3mm) than on the blanket, where I used a 4mm, and I made a smaller Puff Stitch (only 3 loop repeats instead of 4). So this border is two foundation rows of half trebles, two rows of Puff Stitch and a final row of half trebles.


I am quite pleased with it and it should work for the hood border too, hopefully.....
Just a note here on terminology: I use UK crochet terms and of course realize, (mostly as a result of starting off on a US pattern without realizing it!) that terms used in the US and many other places are different from ours. So, just as a clarification guide, generally UK terms are 'one step up' from US ones e.g the stitch US and other crocheters call 'single crochet (sc) we in the UK call 'double crochet, (dc)'.
US Term UK Term
Slip stitch Single Crochet
Single Crochet Double Crochet
Half Double Crochet Half Treble Crochet
Double Crochet Treble Crochet
Double Treble Crochet Triple Treble Crochet
Other stitches, like Puff Stitch are the same.
To make a Puff Stitch:
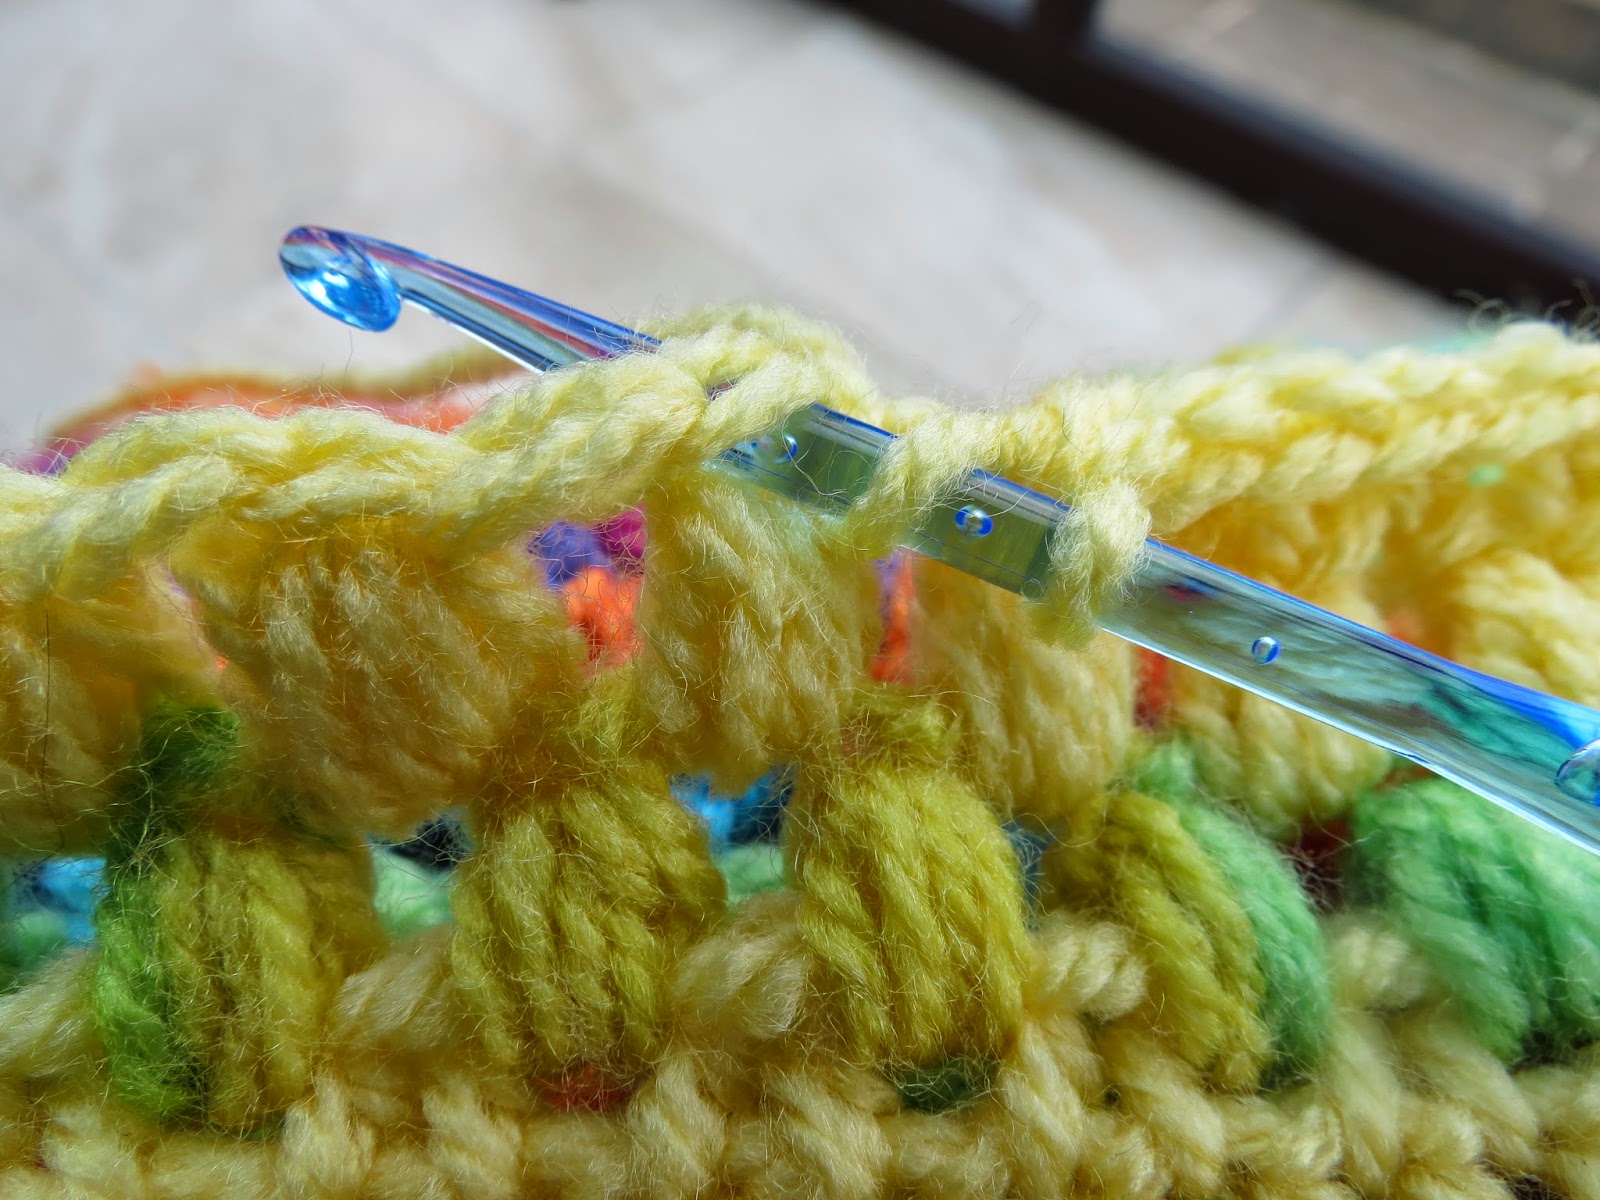
Yarn over, insert hook into stitch and pull up a loop, (yarn over, put hook into same stitch and pull up a loop) 3 more times, yarn over and pull through all 9 loops on the hook.
Pulling up the loops and pulling the hook back through all 9 loops is a bit tricky at first but gets much easier when you've practised a few times. I found it much easier with a slightly bigger hook (I switched to a 5mm for the Puff Stitches) and the more I relaxed and let my hands and yarn go loose the easier it was to create nice loose but even loops that were easier to pull back through! I hope the pictures below help you to see clearly how it works....


So, when you have pulled the yarn through all 9 loops on the hook, as in the pics above, you have this............
You then ch1, through the stitch on the hook - which is over the Puff stitch you just made.

like this............

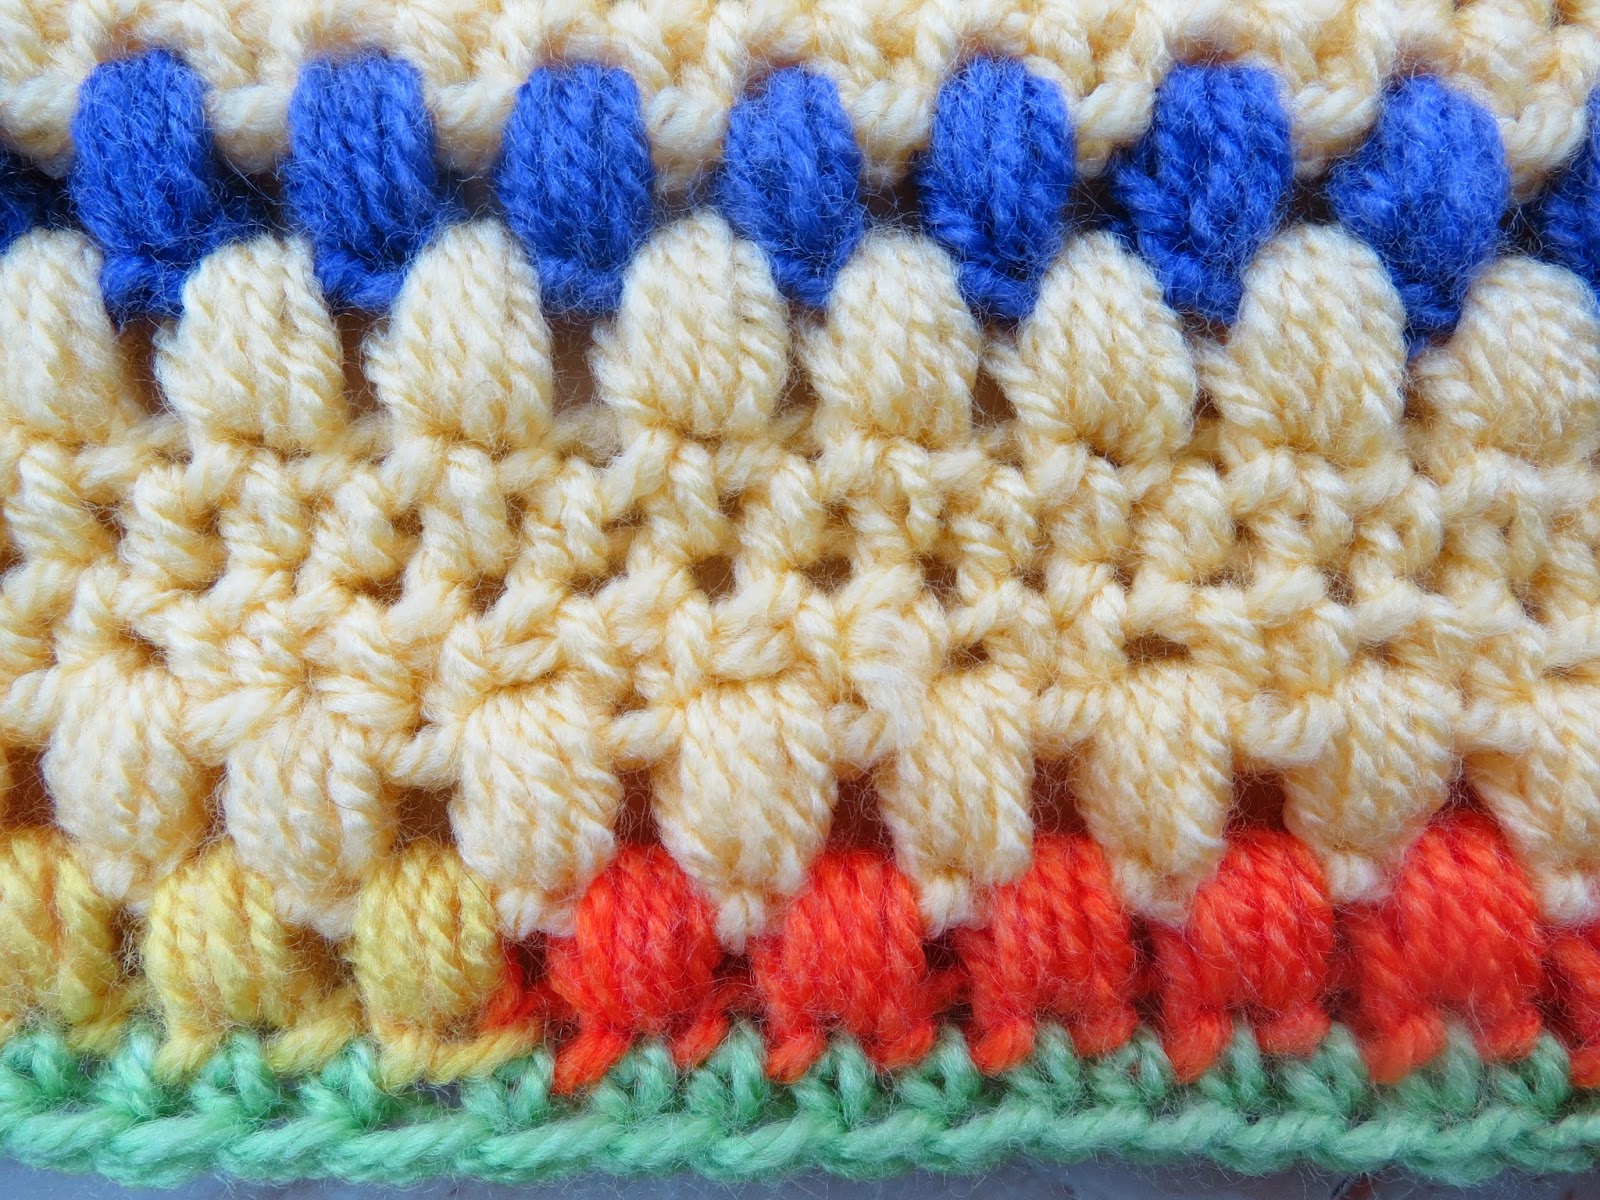
My Puff Stitch Border
Begin with a foundation row of double crochet or half trebles. (I used half trebles for my border) You need multiples of 2, +1 + corner stitches on each side to be worked.
Begin 2sts to the left of the corner stitch.
Round 1: Ch 3, Puff Stitch in the same stitch, ch1, skip 1 stitch & *(Puff stitch into the next, ch1, skip 1stitch) along the side to the corner. (Puff Stitch, ch1, Puff stitch, ch1, Puff Stitch) into the corner stitch. Then ch1, skip 1stitch and repeat from * all the way around border, finishing with slip stitch to first Puff Stitch.
Round 2: Complete another round of Puff Stitches as above but this time work each Puff stitch in the chain spaces between the ones on the first round.
Rounds 3: Work a row of half trebles by making a half treble into each chain stitch between the Puff Stitches, like so.......

and into the chain at the top of each Puff Stitch, like this.....

I hope this makes sense because I'm not used to writing down or explaining how I do things!
I then did another row of half trebles, followed by two more rows of Puff Stitch and a final row of half trebles. But you can work a different combination, as you wish, once you have got the hang of the stitches and how each round works. You can also do double crochets instead of half trebles, although I found the space a bit tight for all those loops when I tried double crochets which is why I switched to half trebles!
Finally, this last pic shows how the finished corners look.

For written instructions and stitch diagrams of Puff Stitch borders and many more, you may like Edie Eckman's Around The Corner Crochet Borders.
Bye for now. And Happy Hooking!
Tricia xxx
No comments:
Post a Comment